Wednesday, June 15, 2011

Bell Pepper Update

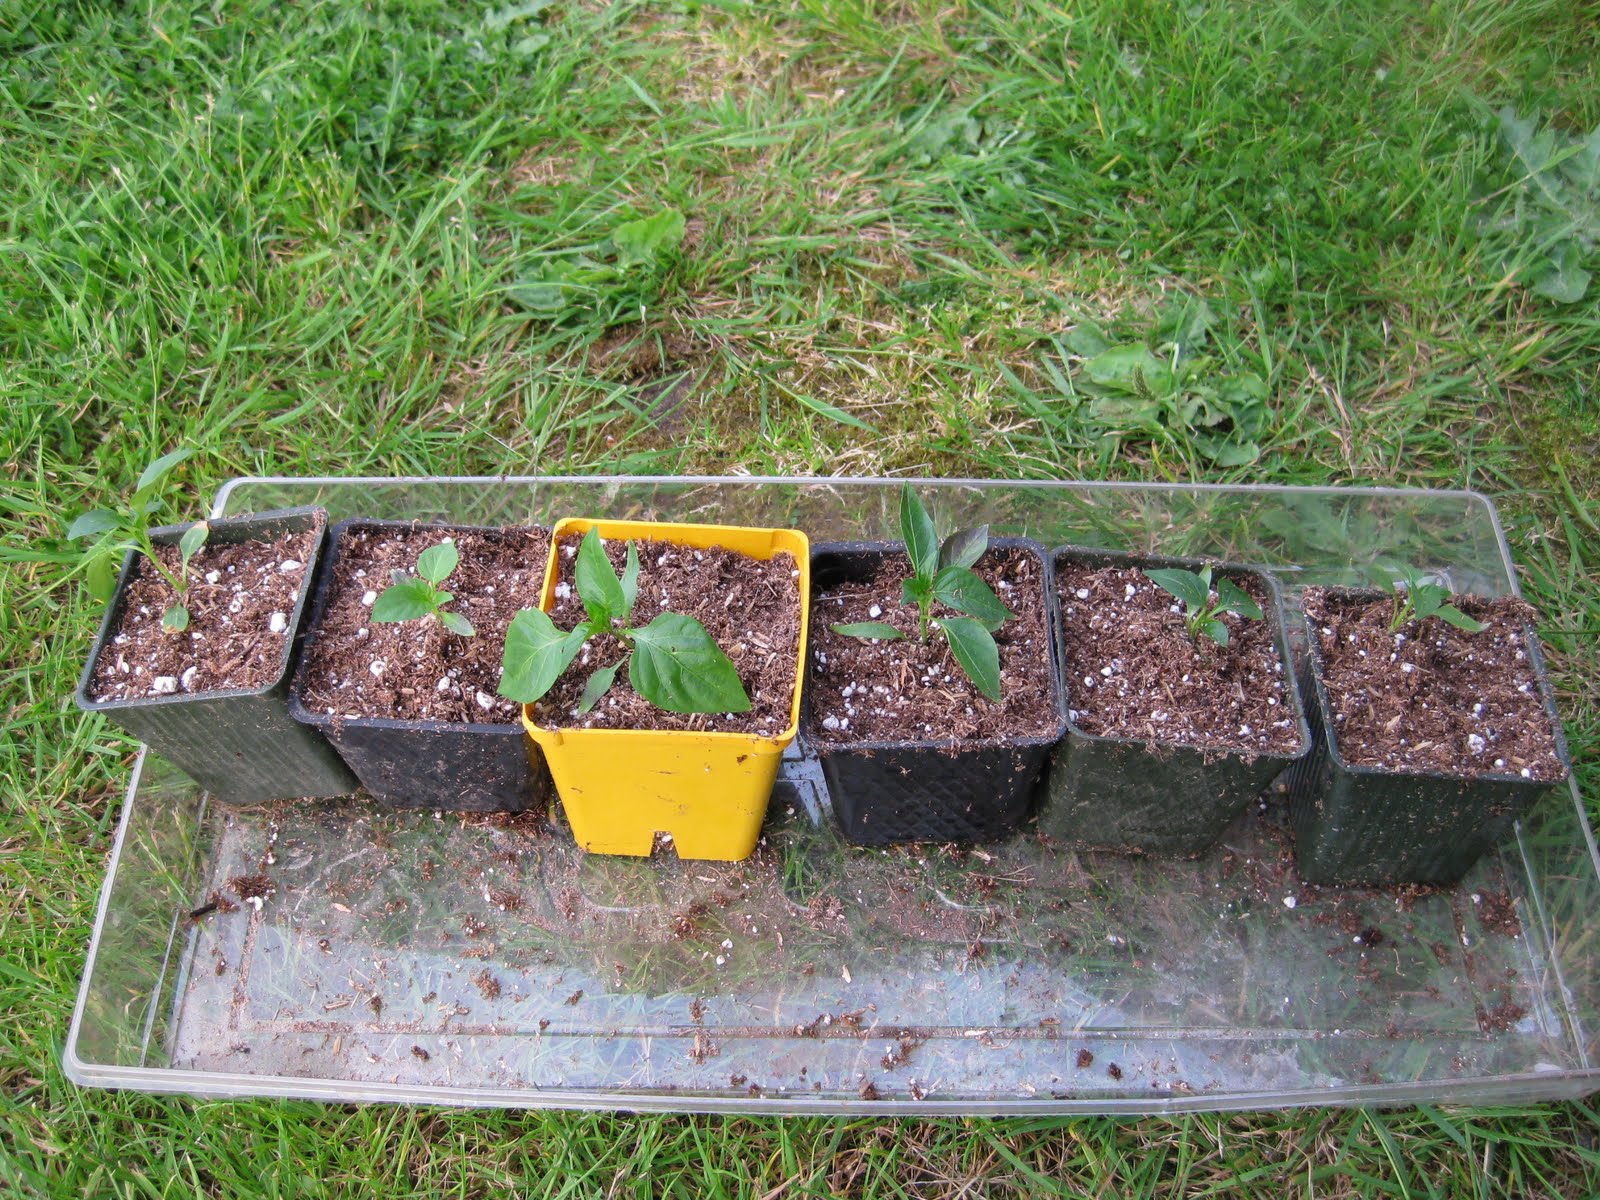
Potting up individual pepper plants into thier own pots.
 On June 14, 2011, I went ahead and potted up the individual pepper plants that had been growing together in three pots for a month.  Two of the pots had five plants and one had four making my total count come to 14 pepper plants. 

Larger plants went with the basil plants to begin acclimating outside during the day.
 After transplanting, I separated the larger plants form the small ones.  The larger plants will begin the acclimatization process along with the basil plants.  I will plant the peppers in the ground at the end of June.

Smaller plants.
The smaller pepper plants will be kept inside under the grow light in an attempt to grow them up before acclimatization and then planting outside.


Next post:  Planting Corn

Sunday, June 5, 2011

How to make an upside down tomato container

All you really need is a bucket with a hole punched out, a paper towel, a tomato plant, and some potting soil.
 If you don't want to shell out money for a Topsy Turvey, it is actually quite easy to make an upside down tomato container of your own with a few things that you may already have around the house.
Carefully thread the tomato plant through the paper towel and hole through the bucket. 
 The first step is to take the paper towel and rip a hole in it.  Carefully thread the tomato plant through the paper towel and then through the hole in the bucket.  The paper towel will help prevent soil from pouring out of the hole and will also help keep the tomato plant in place.
Use chairs or some other way to hold the bucket up if you do not have a helper to hold it up.  The last thing you want is a damaged tomato plant.
 Add the potting soil while the bucket is right side up.  Use a helper or chairs to hold up the bucket so that the tomato plant does not get damaged while the soil is added.
Bucket in place!
 The last step is to water the plant.  You can do this while the bucket is still on the ground or after it is hung up.  Make sure to water it well.  At this point, the excess water will run out through the hole.  This is how it will be and will not affect the tomato plant.  The paper towel will help keep the soil from running out with the water until the tomato plant's stem grows larger and eventually fills the hole.
Use 5 gallon plastic pots as tomato containers.
 Another method is to take black plastic pots that are of 3 or 5 gallon size and make them into hanging containers.  All that needs to be done is to make hanging attachments and punch out a hole for the plants to be threaded through.
Strings attached to hang container.


Tomato plant threaded through container.


Containers being hung up.


Potting soil added to each container.


Watering.


Finished!
 Any type of tomato plant will work in an upside down container.  The important thing to remember is to water the plants more often than upright grown tomato plants in containers.  Because the water is running out next to the stem and the roots are at the top of the container, the roots will dry out much faster.  Another tip is to hang the tomato container in a location where it will receive at least 8 hours of sunlight and to give it an application of water soluable fertilizer such as Miracle-Gro once a week. 

For more information, check out:  How to make an upside down tomato planter

Next post:  Bell Pepper Update.

Saturday, June 4, 2011

Tomatoes Planted

Although a few days later than what I originally planned, I was able to plant my tomatoes today!
 I cut into the black tarp with scissors to make a cross which I then pulled apart to dig out the soil.
 Before planting, I removed the lower leaves from the stem.  Tomatoes have the ability to sprout roots from the stem and removing the leaves will help encourage this growth.  I will cover the stem with soil all the way up to where my fingers are holding the plant. The more roots a tomato plant has, the better the plant will grow.
The first tomato plant planted in soil.

All the rest planted and watered. 
If the weather continues to improve, the plants should take off nicely.  I noticed that a few already had flower buds emerging.  This doesn't necessarily mean that they will form fruit, but is a sign that the plants are reaching maturity.

Next post:  Making your own upside down tomato pot.

Friday, June 3, 2011

At long last Sun has arrived!

A sunflower from last year's garden (2010).
 After a very dissapointing week and a half, the sun has finally come out again!  I had been planning on planting my sunflower seeds on May 31, 2011, but that did not happen on account of it being 55 degrees and raining.  Fortunately, the sun came out today and I accomplished some planting.
The seeds I'm planting this year (2011).  Mammoth Grey Stripe and Red Sun, both Ed Hume Seeds.
 I chose to plant two varieties: Mammoth Grey Stripe, which is the classic 10 foot tall sunflower with the huge yellow head, and Red Sun, which is a smaller variety that comes in shades of orange to dark red. 
Note the difference in seed size.  The larger seed are the Mammoth Grey Stripe while the smaller are the Red Sun variety.

 I dug up the soil along the back of my vegetable garden bed next to the rail road ties and removed any weeds that had sprouted since the last weeding.
I planted the seed in the row with one Grey Stripe seed to every five Red Sun seed since there were less of the Grey Stripe seeds and they will grow larger and taller anyway.  I lightly covered the seed with a quarter inch of soil, watered the row with my watering can, and then applied a layer of Corry's Slug and Snail Death to keep the sunflower seedlings protected when they begin to emerge.  Sunflowers seedlings are slug magnets and I have lost many seedlings to slugs over the years because I didn't protect them soon enough.  Slugs will even take down a four inch sunflower plant if given the chance.  So, if the weather prediction is correct, I should see germination in the next week! 

Next post:  Planting the tomato plants in the garden.

For more information on growing sunflowers go to:  Growing Sunflowers

Monday, May 23, 2011

Growing Basil

Genovese basil in the garden 2010.
Basil is one of my favorite herbs.  Thanks to enthusiasts who are most likely chefs as well as gardeners, there is a basil out there for just about every taste you could imagine.  Being an annual, basil grows well as a indoor plant as well as a summer grown garden herb.  Last year, I only grew Genovese basil and thanks to the huge amount of ravenous slugs and cold weather, my little plant did not grow to much larger that what is shown above.

From left to right:  Genovese basil, Spicy Globe (Greek) basil, Siam Queen Thai basil
This year (2011), I am trying three varieties that are pictured above.  Genovese basil is a staple in Italian cuisine and is also the most commonly found variety.  It produces large leaves that have the classic basil flavor.  Spicy Globe, aka Greek basil, is a smaller leaved variety that I have never tried before.  It grows much more compact and the leaves are much more pungent in flavor.  Thai basil is one of my favorites for Asian cooking.  It is very strong tasting and does wonders in dishes with curry and chiles.  The plant itself is also very ornamental with its dark purple stems and darker green leaves.

Planted basil seeds with plastic sandwich bags over the tops.
Using the technique for planting the bell pepper seed, I filled three containers with potting soil and then moistened the soil before planting the seed.  Basil seed is smaller than pepper seed, so I surfaced sowed the seed and very gently pushed the seeds barely into the soil.  I planted 6-7 seeds per container.  My goal is to keep the basil plants in containers rather than eventually planting them in the garden.  As the plants grow, I will pot them up into larger sizes to keep the plants healthy and productive. 

Recap:  Basil seed of three different varieties planted on May 23, 2011.  Estimated time to germination: 5-10 days. 

For more information, read this article:  How to successfully grow basil

Next post:  Growing sunflowers

Tuesday, May 17, 2011

Growing Lettuce in Containers

Leaf lettuces grown last year (2010).
Today, on May 17, 2011, I decided it was time to get my self going and get my lettuce seed planted.  I love both mixed leaf type varieties and romaine the best and I still had plenty of seed from last year, so it just made sense to grow what I like and save money by using what I already had.

Little Gem from Burpee and Bon Vivant Lettuce blend from Ed Hume Seeds
Both of these lettuces preformed wonderfully for me last year.  I grew them both in the ground so planting and growing them in a container will be something new that I am trying this year.
Terra cotta pot filled with potting soil
My container that I am using is a large terra cotta pot that stands about 18 inches tall and has a 12 inches wide at the top.  I filled it with potting soil and then watered the soil to moisten it.

Planted with seed!
 After moistening the soil, I got the seed of the romaine out and poured a little bit of it in my hand.  I sprinkled the outside rim with the seed and tried my best not to spread it too thick.  With the lettuce blend, I sprinkled the inside portion with that variety.  After planting both varieties, I carefully pushed down the seed into the surface of the soil.  I then watered the seed using the fine mist option on my multi-use watering wand.  Now, it is time to just sit back and wait.  Lettuce seed will germinate in 5-10 days and are much more reliable in cool weather than some other crops that require warmer temperatures. 

For more information, check out this article:  Container gardening: Growing Lettuce

Next post:  Growing basil

Sunday, May 15, 2011

Two Month Old Tomato Plants


The seeds that I used, Yellow Pear and Rainbow Heirloom Mix.  Both by Ed Hume Seeds.
On May 9, 2011, I began bringing the tomato plants outdoors during the day to begin their acclimatization to living outside.  The day time temperatures have been in the mid 50s to mid 60s.  The night time temperatures are still below normal for this time of year so I have been bringing them back inside during the night.


Here is how they looked in a photo that I took yesterday on May 14, 2011.  They have grown significantly and are acclimating well.  I am planning on giving them one more week of staying outside during the day and coming inside at night and then leaving them outside both day and night for the rest of the month.  June 1, 2011, is when I plan to plant them outside in the area prepared for them.  Let's hope the weather will improve and I will have continued success!


Next post:  Growing lettuce in containers